Thursday, November 11, 2021

Loaded baked cauliflower bowl

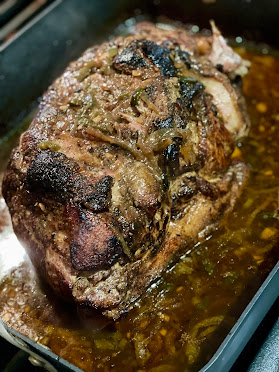
Are you a sucker for a warm oozy cheesy loaded baked potato? I AM! However, I always end up feeling so heavy and yucky afterwards. I have found some recipes for whole head cauliflower bakes and always thought, "oh that looks great! no prepping or cutting of cauliflower needed!" So the other day as a side dish to my beloved dutch oven chuck roast, I made my rendition of a whole head cauliflower bake. 

I started by removing the leaves and any excess stem from the cauliflower head. I put some water and salt in a large pot and brought it to a rolling boil. I tossed the cauliflower head in and cooked it for about 8-10 min (it was a really large head). I pulled it when it was easily punctured with a fork, but not falling apart. I carefully drained it, and put it on a lined cookie sheet and patted it dry. Take care not to burn your hands while drying (not speaking from experience or anything...). I mixed 1 cup of mayo with 3/4 cup shredded parm cheese and slopped that mixture on top of the head of cauliflower and spread it around once it was dry. I decided to top that with some shredded sharp cheddar cheese as well. I baked this for about 25 min at 375 degrees. The mayo and cheese melt into the cauliflower and make it lovely and ooey gooey. I was able to use a serving spoon to "scoop" away servings to plate with dinner and then did the same when putting the leftovers away. 

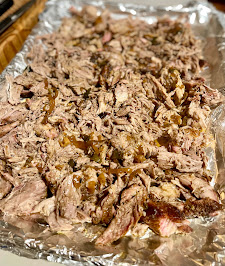
Fast forward to lunch yesterday. I felt like I had zero time after getting home from picking up Amelia from school and had to log on to work. I settled on leftovers, but really didn't want leftover roast. I decided to grab a bowl, fill it with my cauliflower bake and top it with more cheddar cheese, bacon that I whipped up in my toaster oven on the convection setting, and chopped up green onions. and TADA! I had myself an amazing loaded baked cauliflower bowl and man oh man, it was delish. 


And here is some cutie photo spam, because even on the hardest, most exhausting days, these kiddos melt my heart. 


Monday, November 8, 2021

You Had Me At Taco

 We are big taco lovers here in the H House. Also a huge plus, Cooper loves tacos too. A year or so back, I started looking into carnita recipes, and took the dive. To my success, everyone loved it (WAWHOO). This meal has become a staple in our house. Juicy, tender and charred up pork shoulder combined with a Mexican style charcuterie board, I mean how can you say no? I have paired this dish with either warmed up corn tortillas, flour tortillas and even our low-carb wheat tortillas on nights that we aren't wanting to feel so guilty. 

For the pork rub I use salt, pepper, paprika, cayenne pepper, red pepper flakes, chili powder, garlic powder and some oregano. I lather that baby up really well and toss it in my warmed up roasting pan (no rack). I sear all sides of the roast, adding about 2 tbsp of EVOO once the pork is in. While the pork is roasting, I start warming about 48oz of water and throw 3 beef bouillon cubes in to make a beef broth. I slice 3 jalapeno peppers, 1 yellow onion and about 4 cloves of garlic as well. Once I am on my last side to sear of the pork, I throw the onions, garlic and peppers onto the side of the pan and toss them in the seasoned up oil and juices that are coming from the pork. I let those sautee for a bit and soften up. Meanwhile, I am juicing 1 lime and tossing it in with the onion mixture as well. Once the veggies have softened, I scootch them over, lay the pork down with the fat pad side down and pour the beef broth in. I mix the onion mixture around in the broth and baste the pork a few times. Cover that baby up with some tin foil and throw it in the oven, set to 350 degrees. I baste the pork once maybe every 1.5 hours. My pork cooks for around 6 hours in the oven. You know its ready when you can very easily pull a chunk off with a fork and it is tender. Around the 6 hour mark, I pull the pork from the oven and put it on a big serving dish with higher edges because the juice tends to leak. The sign of a perfectly cooked pork shoulder is when you can pull the bone right out from the pork and it comes out clean. It seriously is so satisfying. I shred the pork up, and put it on a lined cookie sheet. (keep in mind, typically there is so much meat that it will not all fit on one tray, so I fully line a sheet and save the rest for later.) I then ladle some of the yummy juices from the roasting pan on top of the shredded pork and put it under the broiler. You want to keep it in long enough to toast up the tips of the pork, but do not burn it. 

Once you have achieved your desired toastyness, remove the baking tray and put the meat in a serving bowl, get your toppings ready to go and chow down! For toppings in our house we enjoy: chihuahua cheese, lettuce, diced onions, salsa, guacamole, enchilada sauce (I know these aren't enchiladas but it really is so good). 


Saturday, November 6, 2021

Keto Candied Pecans

I love fall best of all for many reasons, one being that you can get candied nuts at so many seasonal activities/shops. However, these are typically made with white sugar and brown sugar which make them very high in calories and carbs. I have therefore come up with a low-carb version that I make at home using a combination of Swerve sweetener and Truvia and Swerve brown sugar. 

To start, I generally use a 16 oz bag of raw pecan halves but this can be done with almond, walnuts, cashes etc. For this amount of nuts, I use one egg white and about 1 tbsp of vanilla extract, mixed together. For the dry ingredients I combine the Swerve granulated sugar, Swerve Brown Sugar and Truvia along with some cinnamon (to taste). You want about 1 cup of mixture at the end.. so I generally use 1/2 cup Swerve granulated, 1/4 sup Swerve Brown Sugar and 1/4 cup Truvia (I find that Truvia is typically more coarse and lends to a more "candied" texture of the nuts).

Thoroughly coat the nuts in the egg white/vanilla mixture and then start pouring the sugar mixture over the nuts in sections, making sure to toss the nuts in between each dose of sugar. You want the nuts to be completely covered, and to be able to see granules on the nuts. Place them in a single layer on a sprayed, parchment paper lined cookie sheet. Preheat the oven to 250 degrees and put them in. 


THIS STEP IS CRUCIAL: YOU MUST STIR THE NUTS EVERY 15 MINUTES TO PREVENT BURNING!! (I will oftentimes pull up on the corners of the parchment paper and toss them around that way). 

These will cook for 1 hr to 1 hr 15 min. They are done once they have colored up a bit, and the sugar looks to be beginning to "candy". 

I like to pull the parchment paper from the cookie sheet onto a cooling rack in true ninja mode fashion, making sure I do not drop any precious pecans. These should be set aside to cool and harden up. Store in a cookie tin, or other sealed dish. These do not last long in our house and are my go-to holiday party contribution. 

Thursday, November 4, 2021

Breaded Pork Tenderloin & Bacon Brussels

 We love a good pork tenderloin in the H house. I typically brine my tenderloin for 5-6 hours in a water, salt and seasoning mix. I generally will use paprika, chili powder, salt, pepper, cayenne, garlic powder, onion powder and oregano. I put the mixture into a galloon ziplock bag and place the meat in there with it and let it sit. The always leaves us with juicy, tender meat. 

For this dinner I combined some panko breadcrumbs and Italian bread crumbs together. I melted 2 tabs of butter in a pan and tossed the bread crumb mixture in. I cooked it enough to toast, but not burn, the crumbs. I removed the pork from the brine and allowed the access liquid to drip back off into the bag. After spreading the breadcrumbs out on a serving dish, I rolled the pork into the bread crumbs, applying some pressure and coating the pork evenly. The pork was then placed on a lined cookie sheet with a rack on top. These cooked in the oven for 375 for 1 hr, checking the temperature towards the end. We like our pork a bit more on the rare side so I make sure it's around 145 degrees. Let that baby rest for 10-15 min and she's ready to go.

As a side dish for this dinner I made bacon Brussels. I had already prepped my Brussels on grocery day, halving them and putting them in my storage container. I chopped up 1/2 lb of bacon and fried it in a pan. The next step really depends on how much of a time crunch I'm in.. for example, today I was in a rush to get the veggies done so I used a separate pan to sautee the Brussels (toss the Brussels in with a little bit of avacado or EVOO and sautee until they have a nice toasted edge). However, if I have a bit of time to kill I will just wait until the bacon is done, remove it from the pan and cook the Brussels in the leftover bacon grease. Either way, once the Brussels are soft, I throw in about 1/2-1 cup of heavy whipping cream (really depends on how many Brussels I have going), and let them simmer for a few min. Once the cream is starting to thicken, I add a handful of parm cheese and add the bacon as well as a tab or two of butter. Let this all cook down for about 8-10 min and it should be a thick, creamy consistency. We top this with some more shredded parm once it is plated.